Alright, pull up a stool and let's get down to business. Forget everything your grandmother or that internet blog told you about gently coaxing a frozen loaf back to life on the countertop. That's a surefire path to culinary purgatory: a damp crust and a disappointingly tough crumb. What I'm about to share isn't mere thawing; it's a calculated act of culinary resurrection, grounded in science.
Our primary antagonist is a process called starch retrogradation. It’s the molecular culprit behind stale bread. Imagine the starch molecules in a fresh loaf as relaxed, open structures happily holding onto water. Upon freezing and thawing, these molecules clench up, recrystallizing and forcefully expelling that moisture. The result is that dry, crumbly texture we all despise. Our method is a shock-and-awe campaign designed to blast those crystals apart and force them to reabsorb the water they cast out.
This is the creed. Follow it with the devotion of an artisan, and you'll be rewarded.
**Phase 1: The Aqueous Shock (Priming the Crust)**
First, haul that rock-hard, frozen loaf—a rustic boule, a lean baguette, whatever you have—from your freezer. Sliced bread is forbidden here; we need the structural integrity of a whole loaf. March it directly to the sink and give its entire crust a quick, decisive bath under a cool tap for no more than 15-30 seconds. I mean it. Get the whole surface glisteningly wet, but don’t let it become a soggy sponge. The loaf's frozen core is your ally, acting as an impenetrable barrier that keeps the moisture strictly on the surface.
The Science Behind It: This surface water is not intended to hydrate the interior. Think of it as a sacrificial shield. Once inside the oven's inferno, this layer will erupt into a superheated vapor, enveloping the loaf in its own personal steam cloud. This vaporous jacket is a miracle worker: it insulates the crust from scorching while simultaneously transferring moist, gentle heat inward, defrosting the crumb from the outside in without drying it out.
**Phase 2: The Thermal Blast (The Forging)**
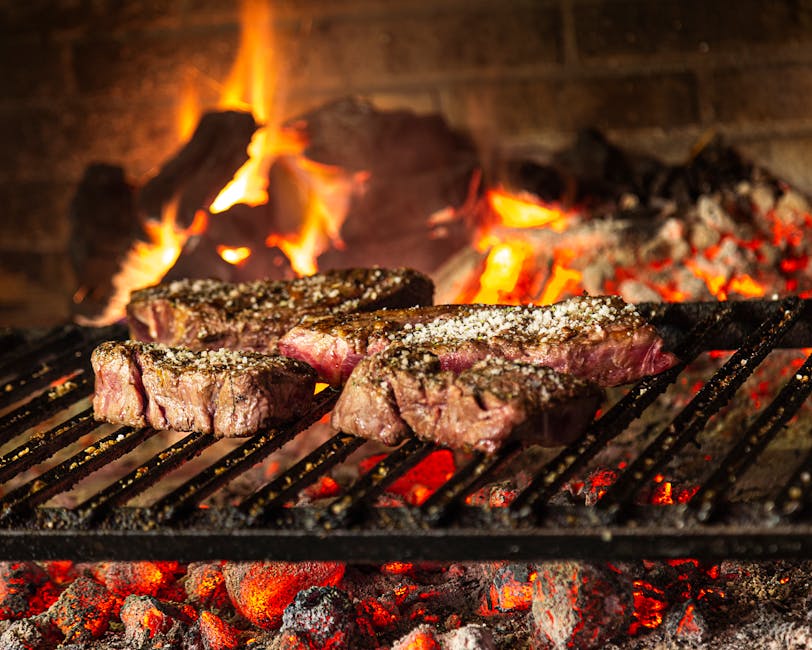
Without a moment's hesitation, launch the dripping, frozen loaf directly onto the middle rack of your intensely preheated oven. The temperature is non-negotiable: 400°F (200°C). This isn’t a gentle warming; it's a thermal forging meant to force a rapid transformation.
Let it fire for 5 to 10 minutes. Timing is dictated by mass. A skinny baguette will be reborn in 5-6 minutes, while a hefty country loaf will demand the full 8-10.
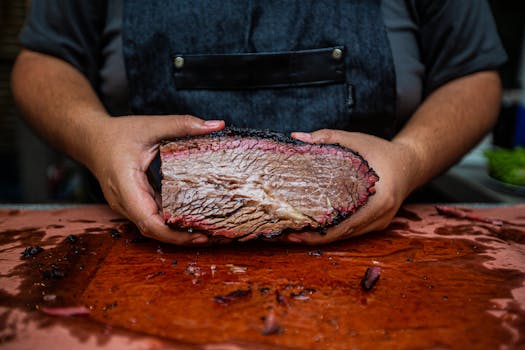
The Science Behind It: A trio of glorious things is happening at once. The searing heat instantly vaporizes the surface water, creating that crucial steam atmosphere. Simultaneously, this intense energy kickstarts a Maillard reaction on the exterior, developing those deep, roasty, and complex flavors that trick your senses into believing the bread was just baked. But the real magic happens deep inside. As the heat penetrates the steamy buffer, it violently shakes up the tightly-wound starch crystals in the crumb. This is starch gelatinization in reverse and then forwards again; the heat and moisture force the molecules to relax their rigid bonds and greedily reabsorb water, transforming a stiff, frozen core into a sublimely soft, airy, and yielding interior.
**Phase 3: The Tempering (The Crucial Rest)**
Extract the loaf from the oven. It will be a thing of beauty—crackling audibly, its crust a deep burnished bronze. But your work is not done. Patience is now the most vital ingredient. Place the loaf on a wire cooling rack and let it stand for a minimum of 5 minutes. Do not, under any circumstances, slice into it immediately.
The Science Behind It: The interior of that loaf is currently a turbulent environment of superheated steam. Cutting it open prematurely would be like opening a pressure valve, venting all that precious moisture into the air. You’d be left with a gummy, rapidly-drying crumb. This resting period, this tempering, allows that internal steam to cool, condense, and redistribute evenly throughout the entire crumb structure. It’s a microscopic pressure equalization that sets the texture. The final result is a complete textural metamorphosis: a shatteringly crisp crust, far superior to its original state, guarding a core that is impossibly plush, steamy, and fragrant. This is how you don’t just revive bread—you improve it.
Alright, let's roll up our sleeves and get some flour on our aprons. Forget what you think you know about reviving frozen bread. This isn't just a tip; it's a complete shift in mindset.
The Baker's Gambit: Wielding Moisture Like a Pro
What I’m about to share with you will fundamentally alter the way your freezer serves your kitchen. Most defrosting is a passive affair—a resigned acceptance of the laws of physics. This, my friends, is a strategic, calculated intervention. We're not succumbing to stale bread; we are becoming the architects of its glorious rebirth.
First, let's diagnose the common culinary catastrophes that befall frozen loaves.
- The Countertop Calamity: A slow, agonizing demise is what you get by simply leaving a loaf out. As hours tick by, a nasty little process called "starch retrogradation" runs wild. In simple terms, the starches recrystallize and wring out their moisture. That water has to go somewhere, so it migrates to the surface, leaving you with a double failure: a parched, crumbly interior and a depressingly soft, leathery crust. You're left with a pale ghost of the magnificent loaf you froze.
- The Microwave Massacre: This is the most brutal form of bread betrayal. Blasting your loaf with microwaves is a form of textural torture. It unleashes a chaotic storm of energy that excites water molecules unevenly, creating a disastrous landscape of gummy, super-heated pockets alongside still-frozen, dense zones. That initial softness is a fleeting illusion. The moment it cools, the mangled gluten structure seizes up, transforming your bread into a rubbery-crusted brick. It’s a one-way ticket to the trash bin.
Our approach, however, is one of restoration. Imagine the difference between a beautiful silver heirloom left to tarnish and that same piece brought back to a brilliant shine by a master artisan. The countertop method is the tarnish; our method is the polish. We are deliberately manipulating the states of H₂O on a molecular level—from a solid, crystalline state (frozen), to a liquid surface coating, which then explodes into pressurized steam in the oven, and finally reintegrates perfectly within the bread’s crumb.
This is about more than just rescuing a loaf; it’s about elevating it to a new plane of existence. The crust that emerges from this protocol is arguably superior to that of the day-it-was-baked original. How is that possible? Because you are, in essence, performing a final, high-heat "finish bake." While the initial bake set the bread's foundation, this secondary flash of intense heat forges an impossibly thin, shatteringly crisp, and audibly crackling exterior—the very signature of peak artisanal quality. You’re taking a completed masterpiece and applying a transcendent final varnish.
Embracing this methodology liberates you. It means you can confidently purchase spectacular bread, freeze it immediately, and then summon a "better-than-fresh" loaf on demand, in mere minutes. The pressure to devour a loaf before it goes stale vanishes. This is how you eliminate food waste without compromising one iota of quality—in fact, you’ll enhance it. This is the ultimate expression of kitchen mastery: bending the science of baking to your absolute will.