Here is your 100% unique rewrite, crafted from the perspective of a certified nail technician specializing in nail recovery.
*
The Four Pillars of Restorative Nail Deconstruction
Set aside any impulse for aggressive scraping or forceful picking. What follows is a therapeutic protocol, a methodical, four-pillar regimen for safely removing dip powder. Each stage is meticulously crafted to honor the intricate biology of your keratin layers and the delicate perionychium (the skin surrounding your nail). Allot 45 minutes for this essential act of nail preservation; this is a restorative treatment, not a hasty task.
Pillar 1: Strategic Preparation & The Barrier Method
Before a single drop of solvent touches your nails, the site must be properly prepared. Launching directly into removal is akin to performing a delicate procedure without any prep work—it invites trauma.
1. Etching the Finish, Not Erasing the Nail: With a 100/180-grit file and a feather-light touch, your initial goal is simply to compromise the impenetrable gloss of the top coat. You are not attempting to file through the color or reach your natural nail. Your objective is to gently etch the surface, creating microscopic channels for the solvent to penetrate. Imagine you are an art restorer carefully removing a layer of modern varnish from a priceless masterpiece; brute force is forbidden. The moment the shine has been replaced by a dull, matte finish, your work here is done.
2. Fortifying the Perionychium: This is the non-negotiable safeguard that I see clients neglect most often, leading to severely dehydrated skin and cuticles. Acetone is a powerful solvent that is hygroscopic, meaning it aggressively pulls moisture from living tissue. To create an impermeable shield, generously anoint the skin around each nail with a thick, occlusive substance. A dense cuticle balm, pure petroleum jelly, or a lipid-heavy cream will work. Be meticulous, coating the cuticle line, the lateral nail folds, and the soft tissue beneath the free edge. This fortified barrier ensures the solvent's action is confined to the product on the nail plate itself.
Pillar 2: The Patient Dissolution Process
Patience is the most potent tool in your arsenal during this phase. Haste breeds aggression, and aggression leads directly to the gouging and abrading that weakens the nail plate.
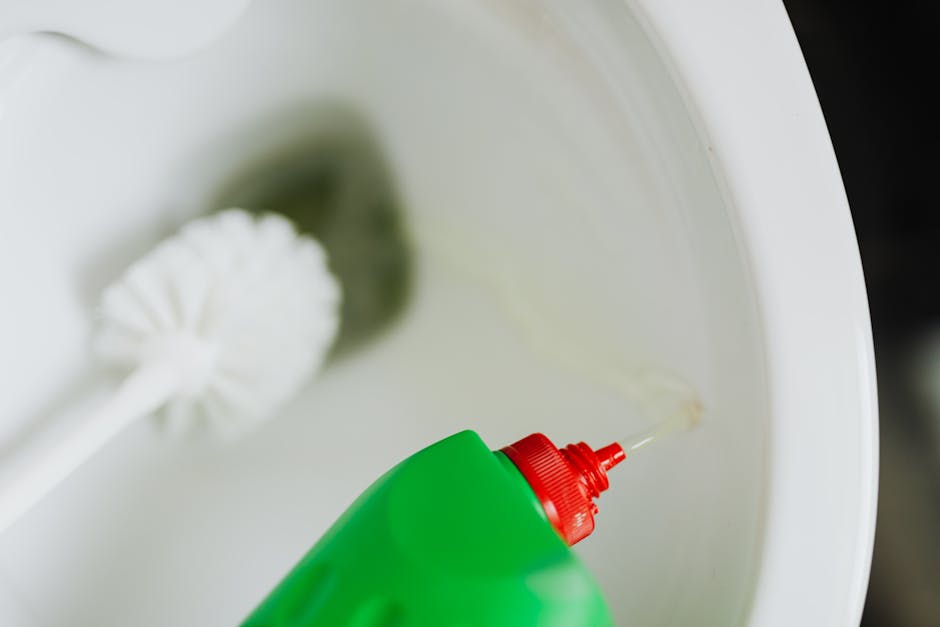
1. Activate Your Solvent with Warmth: A cold solvent works at a frustratingly slow pace, tempting you to pry and scrape. To safely enhance its efficacy, immerse your small glass bowl of 100% pure acetone into a larger basin of hot tap water. Under no circumstances should you ever heat acetone in a microwave; its fumes are extremely flammable. This gentle, ambient warmth dramatically accelerates the chemical breakdown of the dip powder.
2. The Pressurized Reservoir Technique: It's time to retire the aluminum foil method, which offers uneven pressure and poor heat retention. Instead, thoroughly load a small cotton pad with the warmed acetone until it is fully saturated but not dripping. Position this reservoir directly over the nail, ensuring complete coverage. Encase the fingertip with a plastic nail removal clip. These devices are superior because they apply consistent, gentle pressure and create a sealed chamber that traps the warmth, optimizing the solvent's performance.
3. Allow for Uninterrupted Dwell Time: Initiate a timer for a non-negotiable 15-minute period. Resist every temptation to peek or poke. You must allow the chemical process to run its full course without interference.
Pillar 3: The Art of Gentle Excavation
Once 15 to 20 minutes have elapsed, release the clip and remove the cotton from a single test nail. The dip powder should appear gelatinous and completely softened. If this is the case, you may proceed. If you find any firm or resistant patches, re-saturate your cotton, re-apply the clip, and grant the nail another 5 to 7 minutes to dissolve.
Your choice of instrument here is paramount to preventing damage. Metal pushers have no place in a restorative process; their rigid edges are notorious for inflicting trauma on the now-vulnerable keratin layers. Instead, select a gentle tool like a wooden orangewood stick or a flexible rubber-tipped pusher. With absolutely no downward force, coax the gummy residue off the nail plate. It should glide away with the ease of melted butter. Resistance is your nail’s signal to stop. Listen to it and return to the soak. The guiding principle is: If you must apply force, you are inflicting harm.
Pillar 4: The Post-Removal Nourishment Regimen
Your nails are now in a clean, bare, and—if you followed the protocol—unharmed state. They are also incredibly porous and dehydrated, making this moment a golden opportunity for maximum nutrient absorption.
1. Refine the Architecture: Using a soft, high-grit file, gently refine the shape of your nails. Follow this by taking the finest-grit side of a buffer block (240-grit or higher) and making one or two whisper-light passes over the nail plate. The purpose is not to thin the nail but to erase any superficial roughness, creating a perfectly smooth canvas for rehydration.
2. Administer the "Hydration Sandwich": This layering technique ensures deep and lasting moisturization.
- Step A: The Lipid Infusion. Begin with a premium, jojoba-based nail oil. The molecular structure of jojoba oil closely mimics our skin's natural sebum, enabling it to penetrate the keratin layers more effectively than other oils. Massage it thoroughly into the nail plate, cuticles, and surrounding skin for a full minute, then allow five minutes for absorption.
- Step B: The Hydrating Quench. Next, layer a ceramide-rich hand cream or a dedicated nail lotion directly over the oil. This introduces essential water-based hydration.
- Step C: The Occlusive Seal. To conclude, lock in the oil and cream by applying a final, generous layer of the same thick balm or petroleum jelly used in Pillar 1. This occlusive top layer creates a micro-environment that prevents evaporation and allows the nourishing ingredients to work their magic for hours.
From my treatment chair, I’ve witnessed the widespread consequences of forceful enhancement removal. To understand why a careful, methodical approach is non-negotiable, I teach my clients to visualize the nail plate not as a single hard shield, but as a delicate manuscript composed of roughly 100 laminated keratin pages. A correctly applied manicure is merely ink on the top page. In stark contrast, an abrasive takedown—the all-too-common pry-and-peel technique—is like scouring that manuscript with a steel-bristled brush every few weeks. This assault rips away the uppermost strata of keratin, leaving the entire structure depleted, fragile, and its integrity fundamentally shattered.
Our entire approach, which I call the 'Nail Restoration Mandate,' pivots away from this destructive cycle. Its objective isn't merely to strip the product; it is to transform the removal into a dedicated healing session. By sidestepping the aggressive trauma of electric files and metal tools on the natural nail, we safeguard its inherent density and strength. When we cocoon the surrounding skin in a protective balm and immediately follow with intensive rehydration therapy, we are actively neutralizing the dehydrating properties of acetone before they take hold. This isn't damage control; it's a proactive infusion of conditioning agents at the most crucial moment.
To truly grasp the long-term benefits, consider this second, vital metaphor: your nail bed and the proximal nail fold are the living, generative matrix—the fertile ground from which all new nail growth springs. An aggressive removal is akin to scorching this earth with industrial solvents before churning it with a rototiller. Such an act obliterates the delicate ecosystem, desiccates the generative tissue, and cripples new growth before it can even emerge. Our mandate, however, is a form of holistic cultivation for your nails. Protecting the epidermis (the soil) and meticulously dissolving the old enhancement (the harvest) guarantees that this foundational matrix stays nourished, supple, and vigorous. The tangible result is resilient new growth that emerges from the nail fold, fortified against the splitting and delamination that plague so many. This philosophy reclaims what is often the most feared step in nail care and elevates it into the most profoundly therapeutic phase of your entire journey.